Last Updated on November 5, 2024 by Corynn
This post contains affiliate links from Amazon and other brands where I will receive a small commission on any items you buy. You can read the terms and conditions for more information. All photos are credited to the source unless they are my own.
Moving out on your own means you have to cook all the time. Ordering takeout and going out to restaurants can be very costly on your budget. After I moved into my apartment, I started gathering recipes that I loved on my Pinterest account.
After a while, I noticed all of my recipes were in different places to find. Some were on my Pinterest account, others tucked away somewhere or screenshotted on my phone.
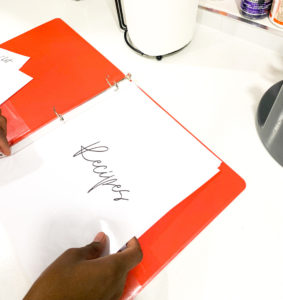
Now, I decided to make a recipe binder so that I could have all of my recipes in one place. Plus, it cost me less than $10 to make! So here is a simple step-by-step guide on how I created my recipe binder.
Things You’ll Need:
A Binder
You can find a binder for less than $4 at the dollar store or you can find one on Amazon.
Recipe Template
Here you can find the exact recipe binder templates I have created for only $4!
Click down below to get your Recipe Binder Template!
Sheet Protector
I can be a bit of a messy chef in the kitchen haha. So I placed my recipe templates and my recipes in a sheet protector. Just to save my recipes from getting dirty and for the recipes to last longer. If you have a laminator you can also laminate your recipes as well.
Dividers
This will help you to divide up your recipes by categories. You can also use the title pages in the recipe. You can also find these at the dollar store for less than $2 or on Amazon.
Step To Create Recipe Binder
Step 1: Print your recipe template, and gather all of your recipes
Print off all the recipes you use during the week and/or if you enjoy the most. If you use Hellofresh, you can save all of your favorite Hello Fresh recipe cards and use them as well in your binder!
TIP: Organize all of your recipes into their categories. It’ll be a time saver if you have lots of recipes to get through.
Step 2: Place your recipe binder template and recipes in sheet protectors
To protect your recipe and recipe template, place your sheet inside sheet protectors and then place them inside the binder.
Step 3: Organize your binder
Remember that stack of recipes you have? Time to place them in their categories.
With our recipe binder templates, Each cover page has the title; main dishes, side dishes, desserts, and so much more! Also, remember to match a divider with a category.
Organizing your recipes can help you so much when it comes to cooking. No more flipping through the pages. Find the category you are looking for and boom! Your recipes are now successfully organized.
Overall…
Creating a recipe binder will help you remember all of your favorite recipes in one place and encourage you to cook more home meals.


